Bill Redirect Application
How To Schedule Tasks in Bill Redirect
Supported Operating Systems:
Windows 98,Me,2000,3000,XP,NT4, Vista.
This tutorial shows how you can schedule a command/action in Bill Redirect
at the time and frequency that you specify.
Use this documentation with the product : Bill Redirect Version 5.0X or more.
(Rev.: 15/03/2009)
Our Internet site:
Email:
info@BillProduction.com
1
GENERAL INFORMATION
To configure this application you have to enter in the field password
www.billproduction.com
, In the
configuration options you have the possibility to change this password for what you want.
To close this
software, type END in the password field.
Application configuration and integration assistance
It's free, fast
(usually the same day)
, and efficient !
Submit your case to
info@billproduction.com
and receive a customized answer !
Custom Application Development
With over 15 years of experience in successfully providing Custom Application Development solutions for
over 300 customers, we have honed our processes and skills to cater to your specific business needs.
To request a feature, a Customize option or any kind of Software:
Contact by email:
info@billproduction.com
2
Step by Step Configuration
This tutorial shows how you can schedule the sending of a command to
Serial Port in
Bill Redirect, at the time and frequency that you specify.
Perfect to control peripherals like:
Bell systems, light, access control, motor, clock display, messages display panel '
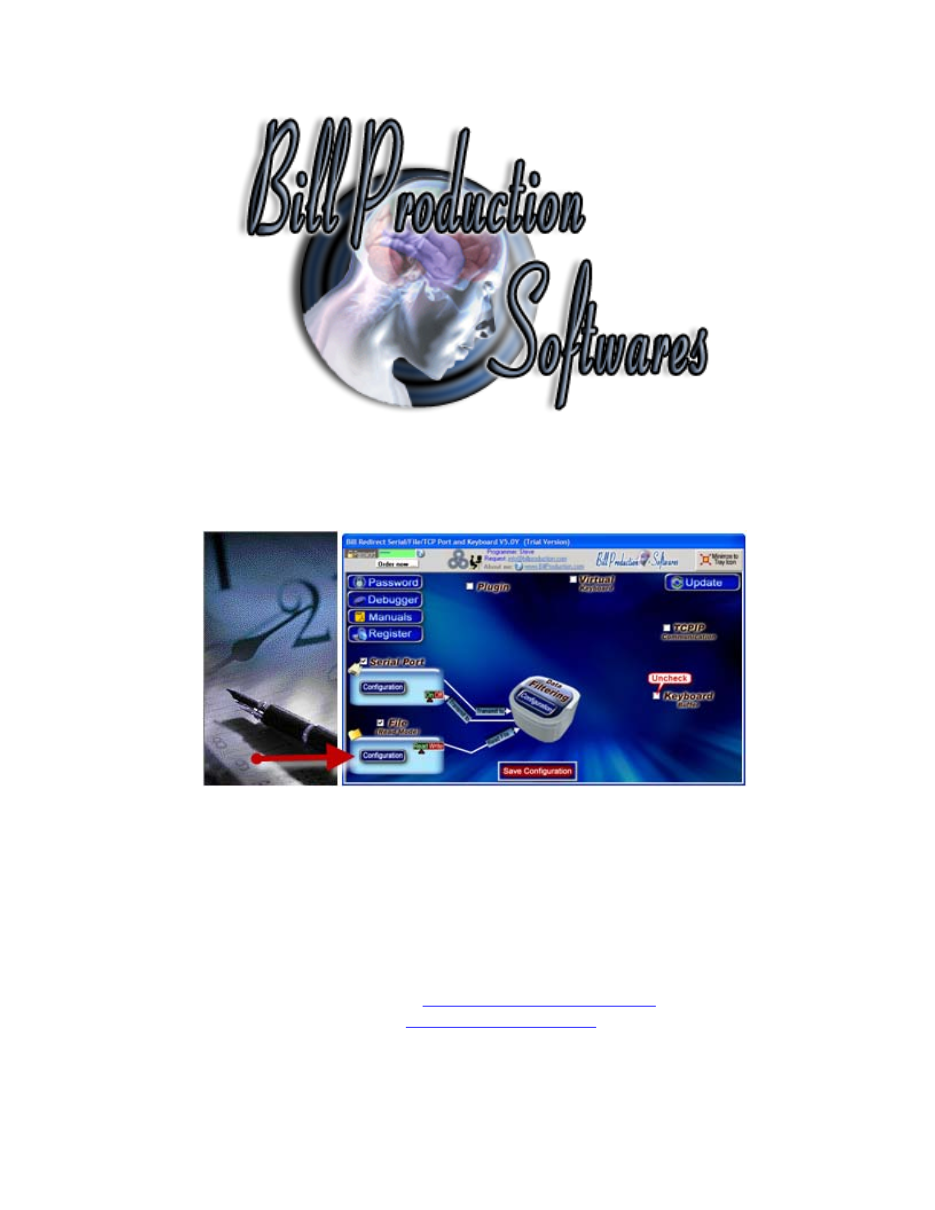
Step #1
(General)
Disable all except the
Serial Port
and
File
sections
Set File to
Read Mode
3
Step #2
(Serial Port Configuration)
Press on button Serial Port:
Configuration
Set the HandShaking to:
NONE
Activate the options:
DTR
a
nd
RTS
Enter the
Serial Port Number
where your peripheral is connected
If the back color field is GREEN, it's because the COM is present and available.
Serial Port Configuration: Enter the configuration of your peripheral
Use this section to sets the baud rate, parity, data bit, stop bit, timeout
(in seconds) and
ASCII ETX
parameters.
4
Step #3
(File Configuration)
Press on button File:
Configuration
Enter in field 'File:' :
C:\BillProduction.CFG\XPEFILE.TXT
Step #4
Download and copy this file:
to your directory:
C:\BillProduction.cfg\
5
Step #5
(Windows Microsoft Task Scheduler)
Windows XP
** If you use Windows Vista, go to Step 7
Press on:
Control Panel/Scheduled Tasks
Select:
Add Scheduled Task
Press browse and locate the file:
C:\BillProduction.cfg\BillRDoAction.exe
'
Select how often you would like to perform the task.
'
Select the time and the days of the week and press next.
'
On the final screen, put a checkmark the box that says
'Open advanced properties for this task when I press Finish'
and then press finish.
6
Step #6
(Windows Microsoft Task Scheduler)
Windows XP
Now we will see the advanced properties window
Replace the word
command
by your command(s)
Example to send Hello on the Serial Port use:
{TX_SERIAL[Hello{ASCII:13}{ASCII:10}]}
To see all possible commands, please consult the manual Bill Redirect
C:\BillProduction.cfg\BillRDoAction.exe
command
C:\BillProduction.cfg\
7
Step #7
(Add Scheduled Task)
Windows Vista
Press on:
Control Panel/Administrative Tools/Task Sheduler
Press on the 'Create Task' Action item ' This will open the Create Task Window.
Press on the Triggers tab press on the 'New' box.
'
Select how often you would like to perform the task.
'
Select the time and the days of the week and press next.
8
Press on button:
Save Configuration
TEST
Step #8
(Add Scheduled Task)
Windows Vista
Press on the Actions tab press on the 'New' box.
Press browse and locate the file:
C:\BillProduction.cfg\BillRDoAction.exe
and press on the Open button.
Replace the word
command
by your command(s)
Example to send Hello on the Serial Port use:
{TX_SERIAL[Hello{ASCII:13}{ASCII:10}]}
To see all possible commands, please consult the manual Bill Redirect
"
C:\BillProduction.cfg\BillRDoAction.exe
"
command
9
For more documentation visit:
If a problem persist use the
Application configuration and integration assistance
It's free, fast, and efficient !
Submit your case to
info@billproduction.com
and receive a customized answer !
10
PERSONALIZE
You can personalize our application with your company name, logo, skins, password, directory.
..
With this
possibility you can distribute our application with your company information !
The end user, will think that
you are the creator of this application !
- To Extract the current configuration setting, just type in the field password:
SAVE_SKIN
- After this action, a message box appear to indicate where is the configuration.
- Now you can modify this configuration files for what you want (Skin*.*).
- To re-load your skin modification type in the password field:
LOAD_SKIN
*At startup our application load automatically your configuration
*To open the mouse position monitor, type MOUSE in the field password and move the main window in the left top corner.
How change the default configuration directory:
*By default the configuration of our application is in the directory: C:\BillProduction.CFG\
To change this directory:
- In the same directory that our .exe application or in your C:\ modify the file:
BPCFGDIR.TXT
* This file contain the default configuration directory.
* Several BillRedirect softwares in differents computers, can use the same directory over the network. If the
configuration changed in a computer, then other computers automatically synchronize in the next 5
seconds.
All the configuration is by default in C:\BillProduction.cfg\*.* then to duplicate the configuration from a computer to another,
just copy this directory.
* Don't forget to close Bill Redirect on target computer before copy the configuration.
For more flexibility/options or an installation package build for your company:
info@BillProduction.com
*Also available on request, all our advertising (PDF format) are available in source mode (Document Word),
send your request by e-mail to:
info@BillProduction.com